CI/CD with Databricks Asset Bundles - Deploying the Bundles (Part 3)
Now that you have configured all three workspaces, dev, test and prod. Let’s learn how to initialise, validate, and deploy a bundle to different targets. Before that, please launch your workspaces in all the environments.
Step 1: Initiate Databricks Asset Bundles
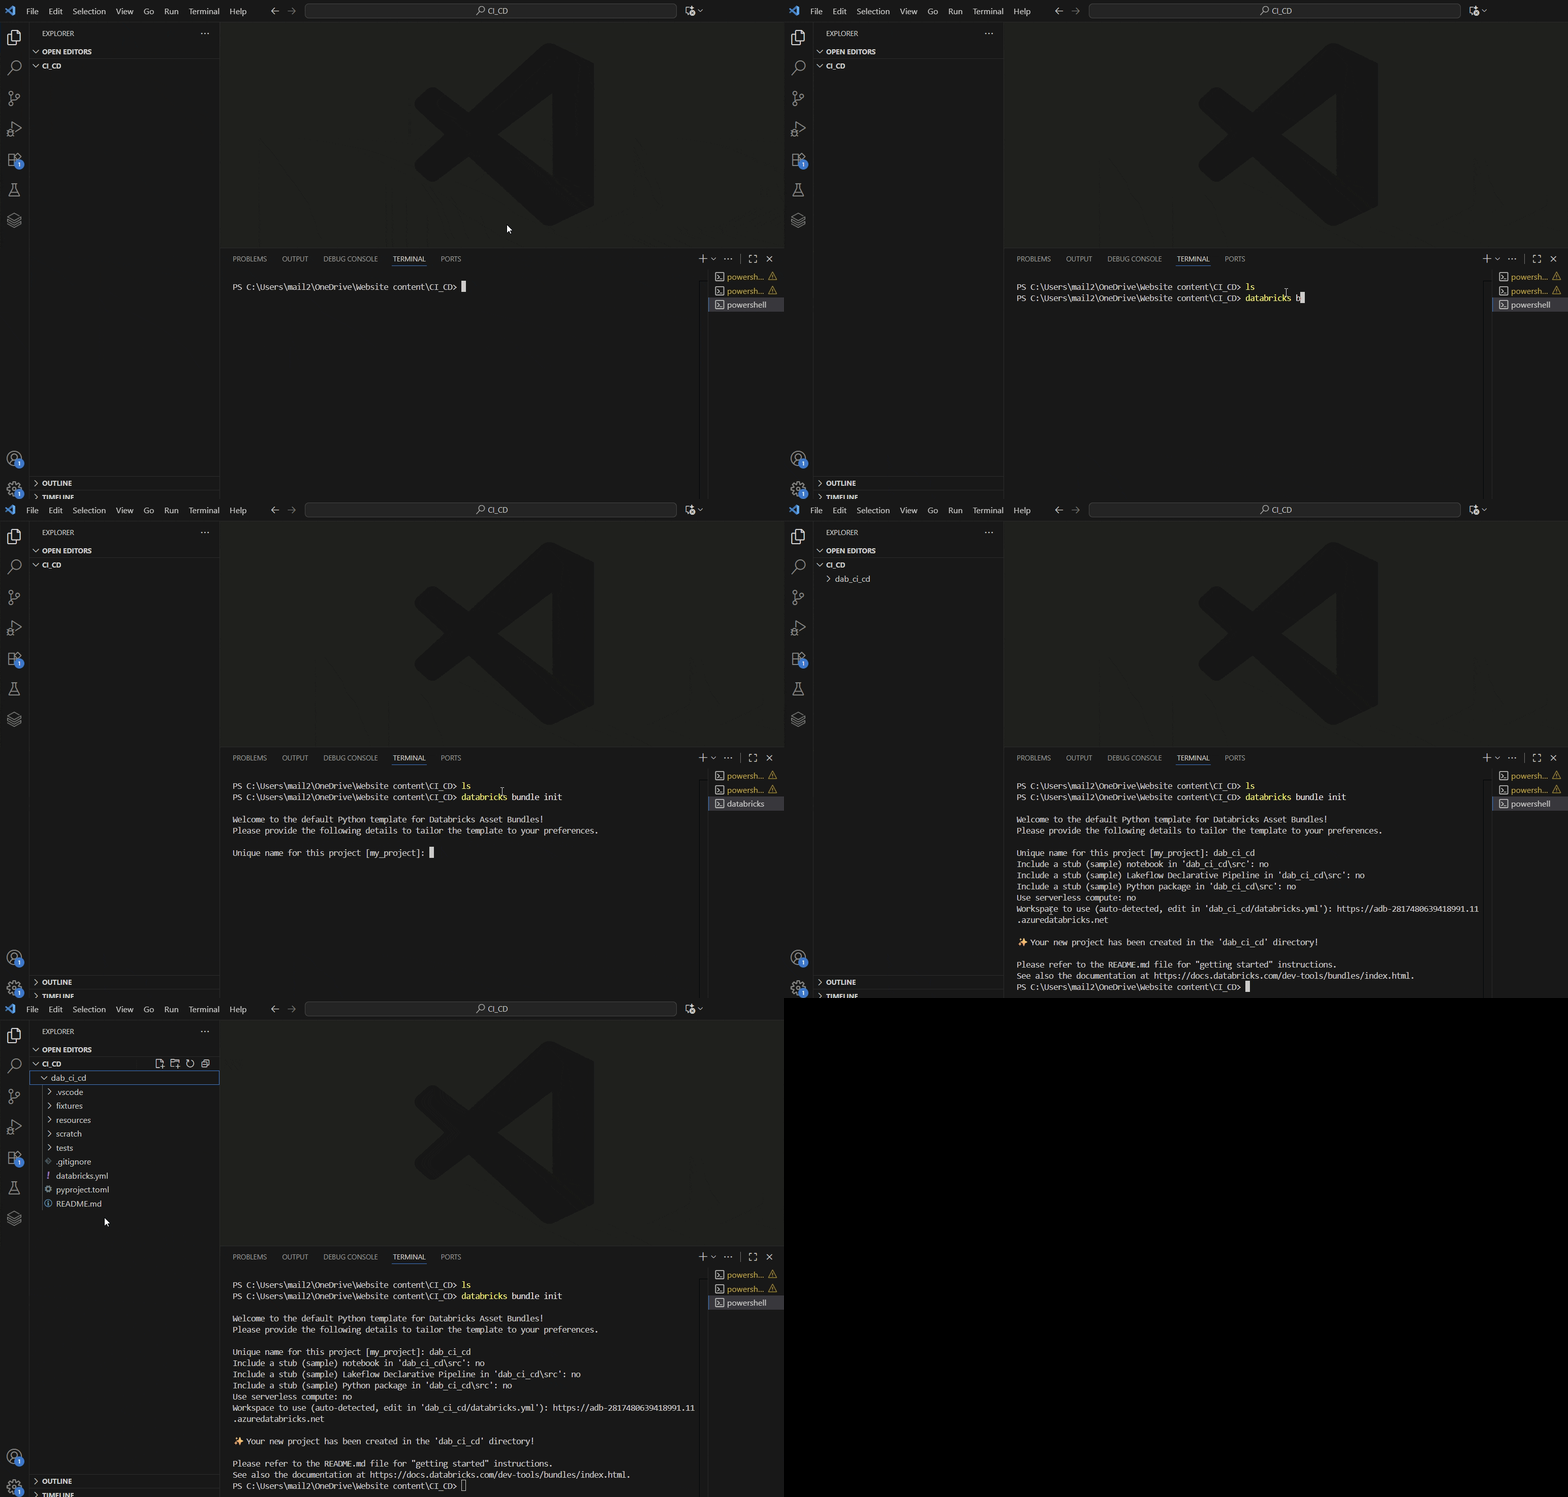
Go to the VS Code editor, then, via the Explorer, choose a folder you want to initialise the bundle.
“databricks bundle init “ is the command used to initiate a bundle. Look at the GIF and try to initiate the bundle.
Go to the Terminal and enter the command.
After you enter the command, it will ask you to choose the template you want. Because I want to create notes and job workflows, I have used the default-python template. Then give a unique name to your project and continue to select ‘no’ to any further templates that it wants to include or even for the compute. we shall create it later on when needed.
Once you can see the project folder created on the left-hand side, you will notice there is databricks.yml file is present. Each project should have only one databricks.yml file. But you can still have other configuration files with different names.
The databricks.yml file serves as the main configuration file, essentially the blueprint of your project. It also references several other configuration files specific to the project. These configuration files use YAML (pronounced “ya-mel”) syntax, which organises information into easy-to-read key–value pairs. YAML is designed to be both human-readable and straightforward to work with. If you’d like to learn more about YAML, please take a look at this.
what happens at the backend:
when you deploy the databricks asset bundles, it takes all the YAML configuration, converts it into a JSON and makes the necessary API calls. Furthermore, to understand the syntax, bundle attributes, etc, I suggest you check out this page.
Step 2: Validate the Databricks Bundle
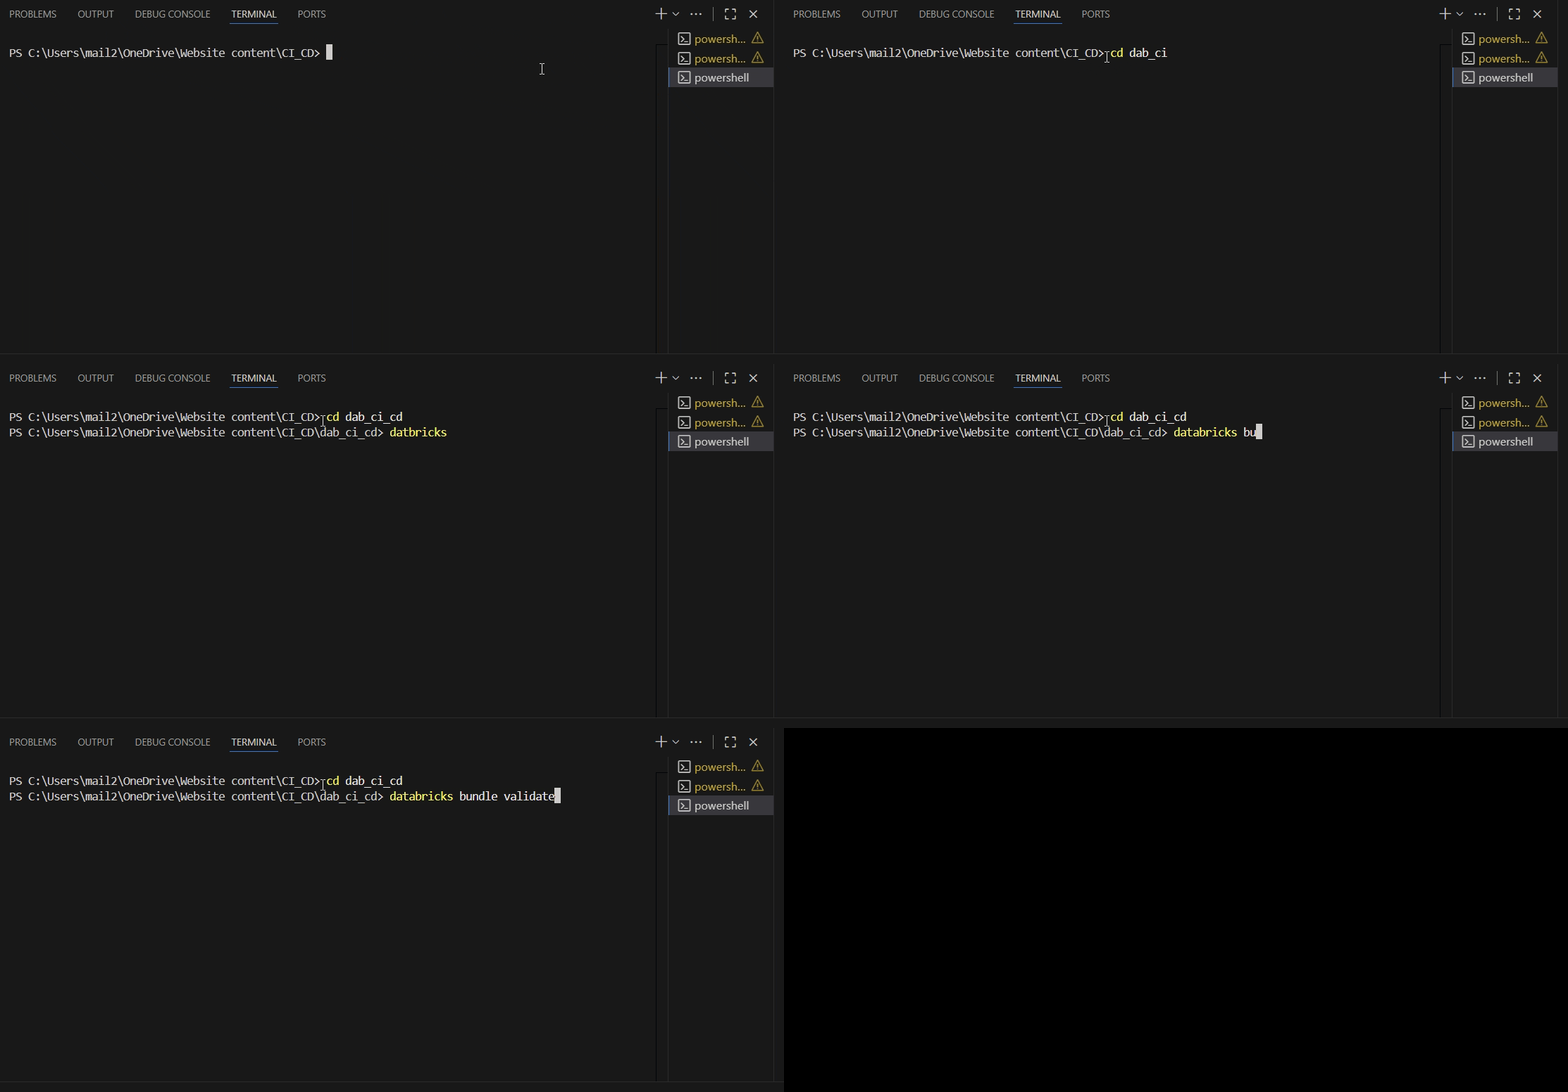
Before deploying the bundle to the target environments, we should validate the bundle using the following command
In Databricks, validating a bundle means checking that your project’s configuration files and structure (like Databricks.yml and related YAMLs) are correct, consistent, and deployable before actually deploying or running anything on the workspace.
It does the syntax check, schema validation, reference validation (verifies if the jobs or any other resources are correctly linked), dependency checks and environment consistency checks
Essentially, it’s a pre-deployment sanity check which helps catch misconfigurations easily and also early, just so we don’t end up having broken or inconsistent bundles in databricks workspaces.
After running the validation, you’ll be able to review key details such as the target workspace, workspace path, and host information. Note that for the development environment, the default root path must include your Databricks username
Step 3: Deploying the Bundle
To deploy the bundle, you have to type in “databricks bundle deploy”
Once you deploy it, it starts to upload the files, etc, to the default dev area, as we did not specify any target environment for it to deploy the bundle.
To ensure that the deployment is successful, you can go to the dev workspace and see the bundle deployment.
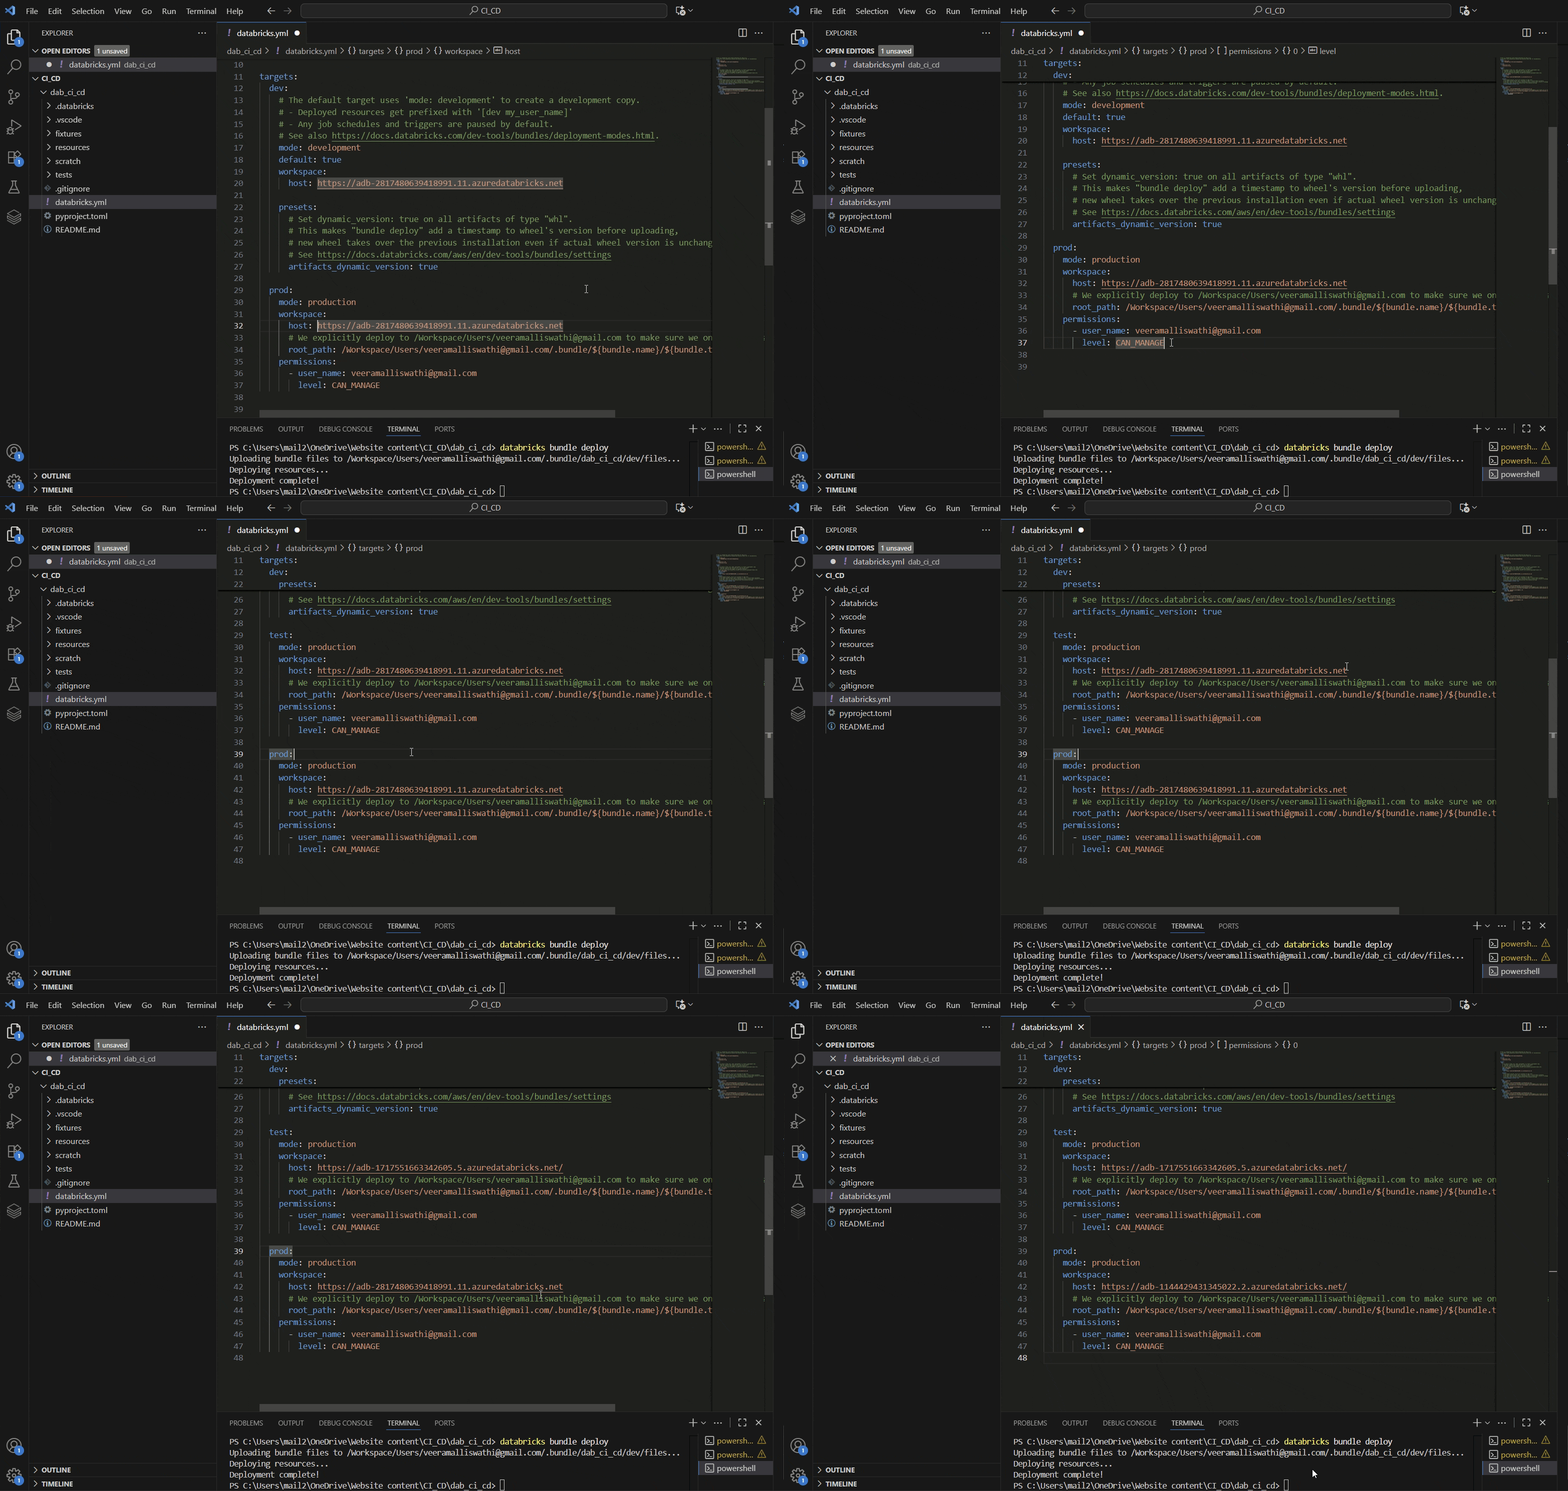
Before deploying the bundles to other target environments, make sure your databricks.yml file has the right test and prod config values
To deploy the bundle to other test and prod environments, you have to specify the target environments you want to deploy the bundle
like so, for test databricks bundle deploy -t test, -t represents the target and for prod databricks bundle deploy -t prod
Now, let’s create a sample notebook on the VS Code editor in our bundle and deploy it in all three environments.
Below is a sample GIF on how you deploy the resources to different environments effortlessly
After you have followed the steps in the GIF, you can see how the notebook we have created appears in all three databricks workspaces by going into each of the workspaces.
Wrapping up:
I hope you now have a clear understanding of how Databricks Asset Bundles enable seamless deployment of assets across different environments.
By incorporating validation steps and environment-specific configurations, you can ensure consistent, reliable, and error-free deployments.
In essence, bundles bring structure and control to the deployment process, making it easier to manage changes, promote assets through dev, test, and production environments, and maintain confidence in the integrity of your Databricks workflows.
In the next blog, I shall show how we can configure the notebooks and the job workflows in a much easier way. until then, stay tuned!


