CI/CD with Databricks Asset Bundles - Setting up the Environment (Part 2)
In my previous blog, we covered the fundamentals of CI/CD and Databricks Asset Bundles. As mentioned earlier in this blog, we’ll roll up our sleeves to set up the environment and explore how each component contributes to the successful creation of this pipeline.
For this, I will be using Databricks Service on the Azure platform. Please make sure you create an Azure personal subscription from the portal. You could also use AWS or GCP, but we wouldn’t be covering it here.
Step 1: Creating Databricks Services
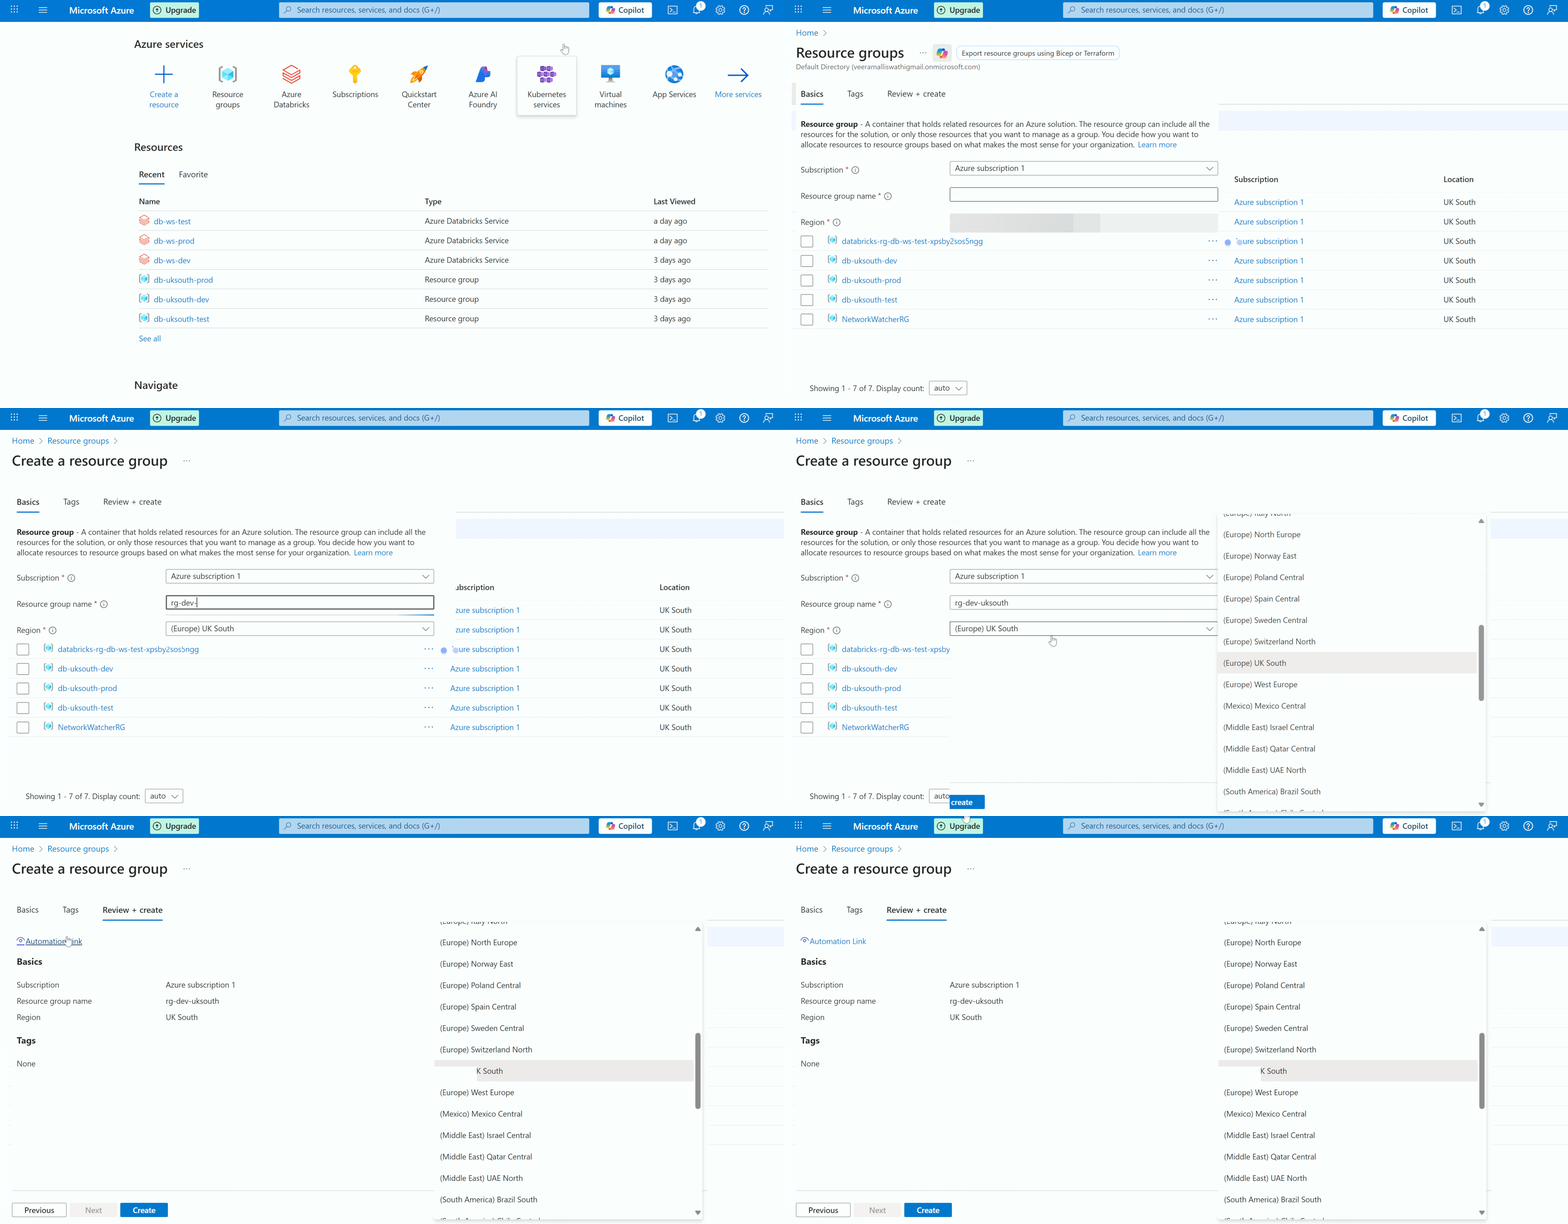
I am creating Dev, Test, and Prod environments. I would be making each of them in its own dedicated resource group. A resource group is a container that holds related resources for an Azure solution. The resource group can include all the resources for the solution or only those resources that you want to manage as a group.
Below is the GIF to create a resource group. Please create this for test and production as well.
Step 2: Create Databricks Workspace
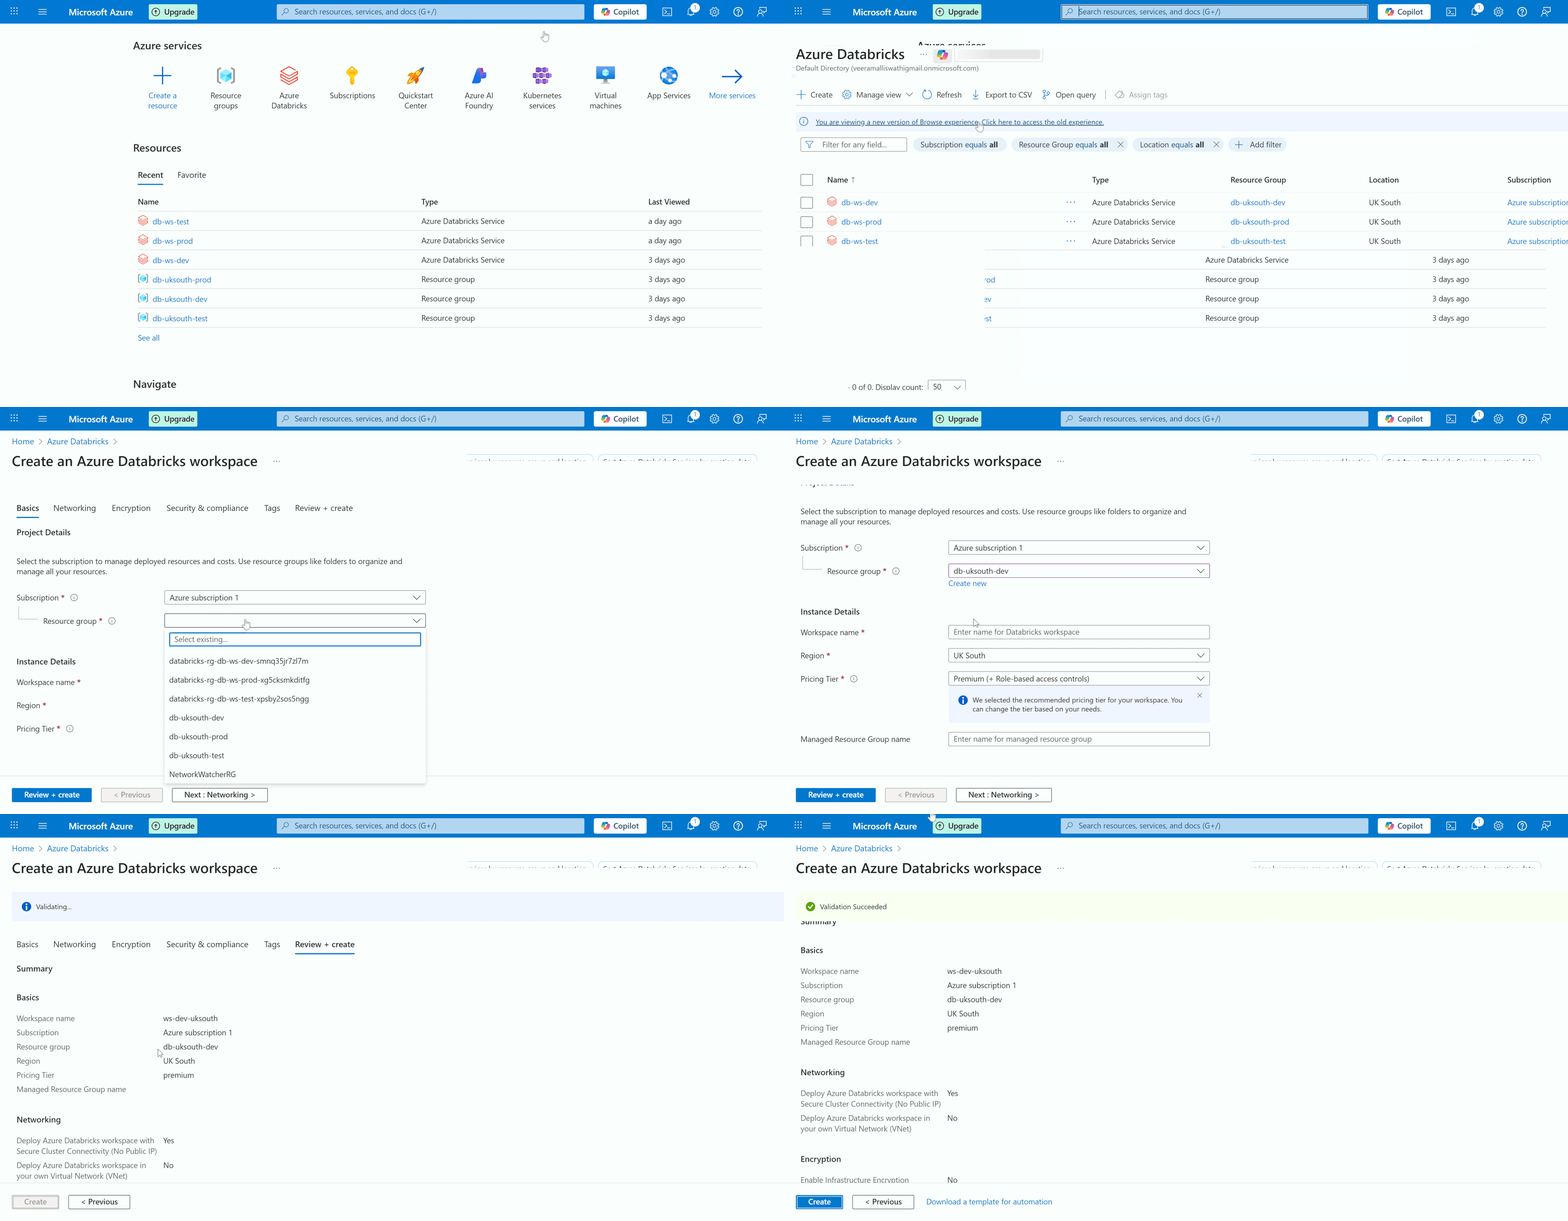
Now, we will create a Databricks Workspace for each of the resource groups that we have created. In the resource group down make sure you select the previous resource group that you have selected. So, you need to link the dev workspace to the dev resource group, the test workspace to the test resource group, and the same applies to prod. Also, make sure the pricing Tier is ‘Premium’ and the region is the same.
Now, we have created three databricks workspaces. Click on each of them and launch the workspaces.
Step 3: VS Code
We would need an IDE for local development. Install VS Code from code.visualstudio.com. Visual Studio has seamless integration with Databricks and is often the preferred one. Select the download for your operating system and just follow along.
Once complete under Extensions, search for Databricks and install the Databricks Extension. This Databricks extension just makes working with Databricks from VS Code much easier.
Should you wish to understand some of the basics of VS Code? Please watch this recording
Step 4: Java Installation
As a prerequisite for running Spark locally, you’ll need to have Java installed. Check the Spark version you’re using and refer to the compatibility matrix to determine the appropriate Java version. For example, I’m using Spark 3.5, which supports Java 8, 11, and 17. You can install Java from the Oracle website
To verify your Spark version, check the Databricks Runtime you’re using. The Azure documentation provides a mapping of each runtime to its corresponding Spark version.
To check which Java version you have installed, go to your command prompt and type in ‘Java —version’
java —Version
Step 5: Python Installation
Similar to how we have checked the compatibility of Java with Databricks Runtime. We need to check the same for Python as well. The same documentation provides the mapping version of Python. In my case, as my databricks Runtime is 15.4 LTE, it is Python 3.11
View→ Command Palette→ Python: Select Interpreter
Step 6: Databricks CLI
I have used Winget to download Databricks CLI, You can use any of the provided options and paste it in your terminal to install the same.
databricks —version
So far, we have installed everything. Now, let’s patch them together. We would also need Databricks Connect; however, we shall cover installing it in the later parts of the series.
We need to authenticate Databricks CLI against our databricks Workspace that we created in step 1, so that we can interact with it from our local computer
Go to VS Code, —> Terminal —> New Terminal. By default, it opens in PowerShell for a Windows machine. Type in ‘datrbicks configure -h’ it gives you the list of commands or flags to use.
configuration commands
Databricks configure —host <host name> —profile DEFAULT for dev and enter the personal access token. To check how to generate a personal access token, go to your specific workspace —> developer —> Manage tokens —> Generate Token
Once you have configured all three workspaces, it should look something like below
databricks auth profiles
Wrapping Up:
I hope setting up the environment hasn’t been a hassle. Next up, let’s learn a little bit more about Databricks Asset Bundles. Let’s also see how we can initialize a bundle, how to validate and deploy a bundle in different environments. Should you have more questions, reach out to me on LinkedIn


